
How to Seal a Leaking Pool Deck Step by Step
by Editorial Team
Last Updated: November 1, 2026
Quick Summary
To seal a leaking pool deck, first identify the source, since the pool shell, plumbing, drainage, or a failed deck joint can all look similar. Then clean and dry the joint, fill any cracks, set backer rod, and apply a sealant matched to the joint type. Allow the sealant to cure fully before exposing it to pool water or foot traffic.
- Use a bucket test to check whether the pool itself is losing water.
- Clean the joint, scrub off algae, vacuum the dust, and let it dry completely.
- Sealant depth should be about half the joint width, with joint width at least 1/4 inch.
- Closed-cell backer rod is standard for pool decks because it will not absorb water.
- Plan for 72 hours of no water and no foot traffic as a safe default cure time.
Table of Contents
- Diagnosing Where the Pool Deck Leak Is Coming From
- What You Will Need and Preparing the Repair Area
- Repairing Pool Deck Cracks Before Sealing
- Choosing and Installing the Pool Deck Joint Sealant
- Step-by-Step Pool Deck Sealant Application
- Curing Time, Pool Use Precautions, and Maintenance
- Frequently Asked Questions
Diagnosing Where the Pool Deck Leak Is Coming From
A leaking pool deck can waste hundreds of gallons of water a week and undermine the concrete underneath. Before reaching for sealant, find where the water is getting in, sealing the wrong joint wastes time and money.
Water in a pool deck area usually comes from one of four sources: the pool itself, plumbing, drainage, or the deck joint. Each looks similar from above, which is why many people seal the wrong spot. For background on how construction sealants differ from general products, read why use specialized construction sealants.
Pool, Plumbing, Drainage, or Deck Joint: Telling Them Apart
Use this quick check to narrow down the source:
- Pool water loss: Check the water level with a bucket test. Fill a bucket with pool water, set it on the top step, and mark both levels. If the pool drops faster than the bucket, the leak is in the pool shell or equipment.
- Plumbing leaks: Look for wet spots that stay soggy even when the pool equipment is off. Hissing sounds near the pump or wet patches over supply lines point to plumbing.
- Drainage problems: Water that pools after rain but dries quickly points to poor slope or a clogged drain, not a sealant failure.
Watch out: Do not seal a joint until you have ruled out the pool shell and plumbing. Sealant on the wrong problem will fail again within a season.
Deck Cracks Versus Pool-Edge Expansion Joint Failure
Cracks and failed joints look alike but need different fixes. A crack runs through the concrete itself, often in a straight or random line.
Press along the joint with a screwdriver. If the sealant feels loose, brittle, or peels out easily, the joint has failed and needs to be replaced. If the concrete is cracked on either side, plan to repair the crack first.
What You Will Need and Preparing the Repair Area
Gather your materials before you start. Stopping halfway through a joint to hunt for a tool leads to poor adhesion.
Basic supplies include:
- A stiff wire brush and utility knife
- A shop vacuum and clean rags
- A caulk gun
For sealant options, the Geocel 3300® Professional Grade Polyurethane Sealant is a single-component option that cures with moisture and adheres to most surfaces without primer. You can find it at ShopGeocel 3300 sealant. Where a joint needs a structural bond to masonry and flexibility, compare the Geocel 4600™ Hybrid Structural Adhesive Sealant, and browse the full range of sealant products here.

Prepare the area this way:
- Remove all loose debris, old caulk, and mastic from the joint.
- Scrub the joint with a wire brush to remove algae and chalky residue.
- Vacuum out the dust. Dust blocks adhesion.
- Let the joint dry completely. Most sealants will not bond to a damp surface.
A common mistake is sealing a joint that looks clean but still holds fine dust. Run your hand along the edges. If it comes away gray, clean it again.
Repairing Pool Deck Cracks Before Sealing
Fix cracks before you seal the joint around them. A sealant can bridge a small gap, but it cannot hold together a crumbling slab.
For hairline and moderate cracks, work from the least invasive fix upward: clean the crack with a wire brush, vacuum it, then fill it level with the deck and let the filler cure fully before moving on.
Choosing a Crack Filler and Filling Cracks and Gaps
Choose a crack filler rated for concrete and for wet or submerged conditions, and confirm on the label that it suits pool-deck exposure and foot traffic. Press the filler deep into the crack with a putty knife, then smooth the top flush.
Wider gaps need backer rod before any sealant goes on top. Stuffing a wide gap with sealant alone wastes product and leads to early cracking.
Geocel 3300® Professional Grade Polyurethane Sealant →
Choosing and Installing the Pool Deck Joint Sealant
The right sealant depends on the joint, the substrates on either side, and the exposure. Pool decks face chlorinated water, UV, thermal cycling, and constant foot traffic, so a product built for movement and moisture is the baseline. Selecting a material that bridges these chemical and structural gaps ensures the integrity of the surface while providing a clean foundation if you decide to upgrade pool deck aesthetics.
Match the Sealant to the Joint and the Substrates
Work through these variables before you buy a cartridge:
- Movement class. Expansion joints at the pool edge open and close with temperature and the weight of water. A sealant rated for ±25% joint movement handles that cycling; a rigid patching compound does not.
- Substrate pair. Concrete-to-concrete, concrete-to-coping, coping-to-tile, and masonry-to-metal all behave differently. Porous substrates need a sealant that wets out and grips; non-porous surfaces like tile and metal need adhesion that does not rely on absorption.
- Existing sealant. Silicone will not bond over cured polyurethane, and polyurethane will not bond reliably over cured silicone. If the old joint was silicone, remove it completely, residue inhibits the new bond. Test a small bead on a cleaned offcut and check adhesion after cure.
A practical comparison by joint type:
Joint Type |
Suggested Sealant |
Why |
|---|---|---|
Concrete-to-concrete, moderate movement |
Geocel 3300 polyurethane |
Primerless adhesion, moisture cure, flexible |
Masonry or mixed substrates |
Geocel 4600 hybrid |
Bonds to masonry, stays flexible |
High-movement expansion joints |
Geocel 8125 100% silicone |
Rated for ±25% joint movement |
The Geocel 8125® 100% Silicone Sealant is a high-modulus acetoxy-cure silicone with strong adhesion to non-porous surfaces and handles ±25% joint movement, suiting expansion joints that open and close with temperature changes. Where the joint is porous or the substrates are mixed, a polyurethane or hybrid is usually the better fit.

Joint Dimensions and Backer Rod Installation
A sealant joint needs the right shape to work: sealant depth should be about half the joint width, and the joint width should be at least 1/4 inch. A joint that is too shallow or too deep will tear or pull away as it moves.
- Measure the joint. Note the width at its widest point, not the average, the backer rod must be slightly larger than the widest gap so it stays in place.
- Select backer rod. Closed-cell backer rod is standard for pool decks because it will not absorb water. Size it roughly 25% larger than the joint width so it compresses and grips the side walls.
- Set the depth. Push the rod in with a rounded tool so it sits about 1/4 inch below the surface, giving the sealant room to form the correct profile.
- Confirm two-sided adhesion. The sealant should bond only to the two side walls, not to the bottom of the joint. Three-sided adhesion lets the joint flex without tearing.
- Check the profile. After tooling, the sealant should be slightly concave, not flat or bulging, a concave profile stretches and compresses more evenly.
The sealant choice often matters less than the joint preparation. A good product fails quickly on a dirty joint, and a marginal product on a properly prepared joint often outlasts the reverse.
Step-by-Step Pool Deck Sealant Application
With the joint cleaned, the crack filled, and the backer rod set, you can apply the sealant.
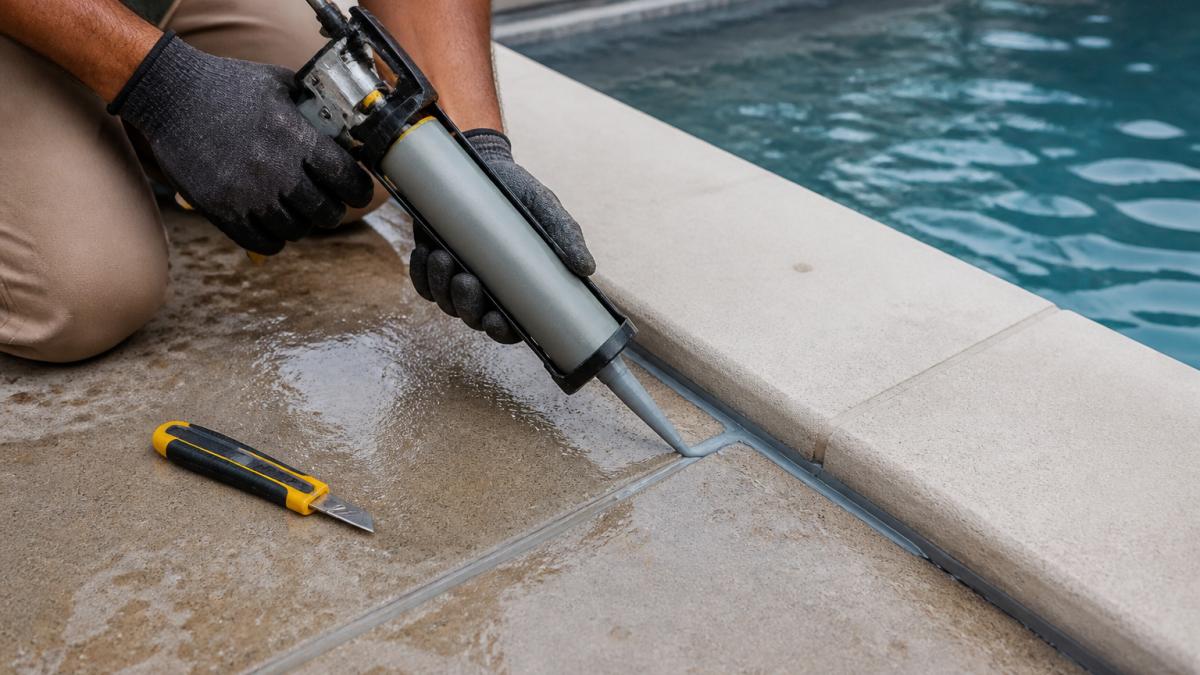
- Cut the nozzle. Cut the tip at an angle sized to the joint width.
- Load the caulk gun. Keep steady pressure to avoid air pockets.
- Run a continuous bead. Pull the gun toward you in one smooth pass.
- Tool the surface. Smooth the bead with a wet finger or tool within the working time on the label.
- Remove the masking tape. Pull it off before the sealant skins over.
- Protect the joint. Keep foot traffic and water off until the sealant has cured.
Watch out: Do not add water to the sealant to make it spread. That weakens the bond and causes early failure.
Curing Time, Pool Use Precautions, and Maintenance
Sealant needs time to cure before it sees water or foot traffic, and the cure window is where most DIY repairs fail. Check the cure time printed on the cartridge, since it varies by product, humidity, and temperature, but plan around these general stages.
Cure Stages and What They Mean for Pool Use
- Skin-over (typically 1-2 hours). A film forms on the surface. The sealant is no longer workable, so remove masking tape before this point.
- Tack-free (typically 4-24 hours). The surface no longer feels sticky. Light foot traffic may be possible, but water exposure is still risky.
- Full cure (typically 24-72 hours for polyurethanes; longer for thick beads and cool, humid conditions). The sealant reaches its rated strength and movement capacity, the earliest safe point for pool water and regular foot traffic.
A practical sequence for a pool deck repair:
- Apply sealant and tool the joint within the working time on the label.
- Remove masking tape before skin-over.
- Keep foot traffic off the joint for at least 24 hours.
- Keep pool water and hose water off the joint for the full cure time on the label, plan for 72 hours as a safe default.
- Resume normal pool use only after full cure, checking the joint for tackiness or soft spots first.
Managing Concrete Movement and Expansion Joints
Sealant is a wear item, not a permanent fix. Expansion joints move with temperature, and the sealant absorbs that movement until it fatigues. Understanding why joints fail helps you time replacements:
- Thermal cycling. Joints open in heat and close in cold. A sealant at the edge of its movement rating will tear at the extremes.
- Water intrusion. Once water gets under the sealant, freeze-thaw cycles and hydraulic pressure push the bead out. A joint that sounds hollow when tapped may already be compromised.
- UV degradation. Sun breaks down the surface of some sealants, causing chalking, hardening, and cracking. UV-resistant formulations last longer in full-sun exposures.
Seasonal Inspection and Maintenance Cadence
Inspect the pool deck joints at least once a season, spring before pool season and fall before winter are the practical checkpoints. Look for:
- Gaps, pulls, or separation at the joint edges
- Hardening, cracking, or chalking on the sealant surface
- Peeling or lifting beads
Small problems caught early take a few minutes to fix. A joint that has failed across its length usually means removing and redoing the whole joint rather than spot-patching. Keep a cartridge of the matching sealant on hand so a minor pull does not become a full replacement.
A leaking pool deck is easier to fix with the right product on hand. Geocel has made professional-grade sealants for over 50 years, and each product is built for a specific substrate rather than an all-purpose job. Start with the joint type, choose the matching sealant, and order what you need from the Geocel sealant lineup.
Frequently Asked Questions
How do you seal a leaking pool deck?
Start by finding the leak source, then clean out old sealant and debris from the joint or crack. Fill cracks with a suitable crack filler, install backer rod in wide joints, and apply a flexible polyurethane sealant such as Geocel 3300 Professional Grade Polyurethane Sealant, which cures to a weather-resistant, flexible seal. Tool the bead smooth, keep the area dry while it cures, and check the repair after the next rain or when the pool is refilled to confirm the leak has stopped.
What should you use to seal the gap between a pool deck and the pool?
The gap at the pool edge is an expansion joint and should be sealed with a flexible sealant rather than a rigid filler, because the concrete moves with temperature and water changes. Polyurethane sealants such as Geocel 3300 are non-sag and primerless on most substrates, and Geocel 4600 Hybrid Structural Adhesive Sealant adheres in damp or dry conditions across masonry and other construction materials. Install backer rod first so the sealant bonds on two sides and does not stick to the bottom of the joint.
Can you apply sealant to a wet pool deck?
Most sealants need a dry surface to bond properly, so the deck should be dry before application. Geocel 4600 is rated to adhere in damp or dry conditions, which can help when a joint stays damp, but standing water should still be removed and the surface allowed to dry as much as the product's label allows. Check the product's application temperature and moisture guidance before starting, and avoid applying sealant right before rain.
How long should pool deck sealant cure before the area gets wet?
Cure time depends on the product, joint depth, temperature, and humidity. Polyurethane sealants such as Geocel 3300 cure by moisture, so humidity and thickness affect how long they take. Follow the cure time printed on the cartridge, keep foot traffic and pool water off the joint until it is fully cured, and avoid heavy water exposure during the first days after application.
